Entity Framework is an ORM (Object Relational Mapper) that is designed to handle data access for developers, abstract code to open database connections, create and manage transactions, and manage SQL objects. Entity Framework comes in two flavors: Model-First which is designed to use an existing database and Code-First which can create a database based on C# models, which is what we’ll be looking at in this article. Regardless of the path you take, Entity Framework is open-source so you can view all of the source code or contribute to changes on EF’s official website.
In this tutorial we will explain how to create an MVC application which uses Entity Framework Code First to talk to a SQL Server database which will hold three tables: Clients, Projects, and Invoices. Code First is ideal for developers that just want to write code; you create the classes, and Entity Framework will create the database to match. This means less time spent setting up the data tier, and more time coding. Code First uses a process called Migrations to manage changes to the database; each set of changes is kept in a separate file. This makes it easy to roll back to a previous version of your database, or to add new data along with a new table, for example.
The other benefit of Code First is unit and integration testing: since the whole database structure can be gleaned from C# classes, it’s much easier to mock out a repository to impersonate the database for unit tests. And, when you’re ready for integration testing, It’s a snap to set up a new database in your testing environment; just let Entity Framework apply all of the migrations that you’ve created and you’re all set!
While we’ll be using the default code provided for both EF and MVC, keep in mind that this is just a beginning. In an upcoming article we’ll discuss how to generate advanced code for custom functionality.
The following process is based on Visual Studio 2013 and MVC 5 but should work similarly in Visual Studio 2010 forward.
Step 1: Create a new project
First create a new project. We’ll create a new ASP.NET application with MVC.

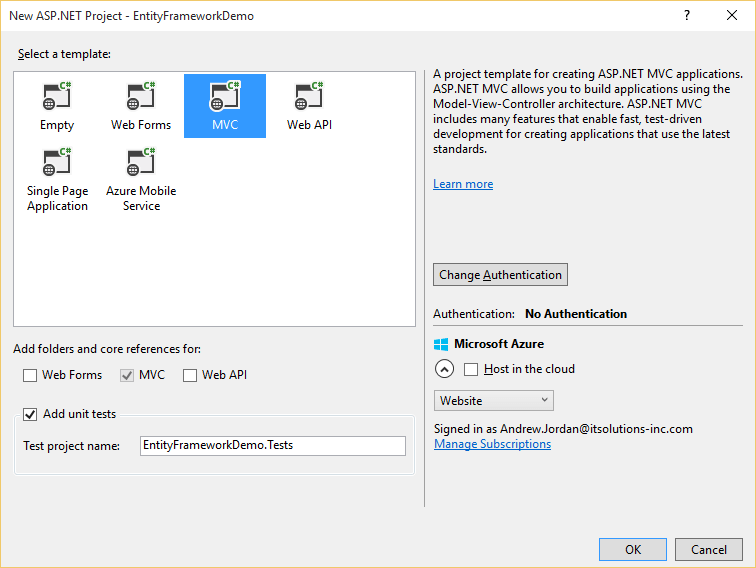
We’ve chosen No Authentication for this tutorial so there’s less setup to connect; you should use authentication if you plan on building anything other than a test project with this tutorial. In this test scenario we will not be hosting the database or application in Azure either so we’ll leave those steps out for now.
Step 2: Install Entity Framework from NuGet
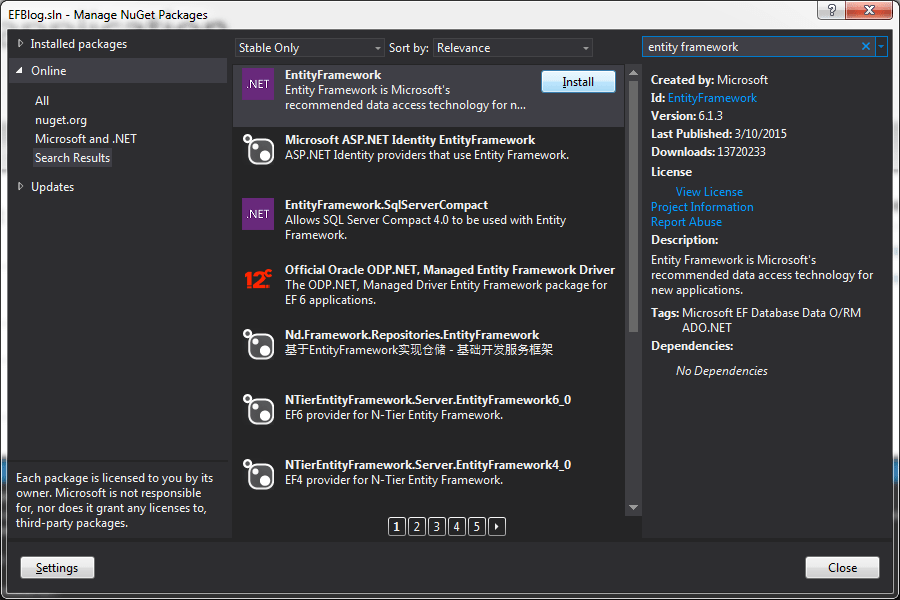
Next, open up the NuGet Package Manager and we’ll have NuGet do the heavy lifting. If you’ve never used NuGet before, it’s a catalog tool that helps you find and install “packages” from various sources for the Microsoft development platform. NuGet will also handle referencing and set up if necessary.
Go to Tools -> Nuget Package Manager -> Manage NuGet Packages for Solution.
Now search nuget.org for ‘Entity Framework’, we’ve selected version 6.1.3 which is the most current version to date.
Taking a look into our solution, we see that two references were added; for Entity Framework and Entity Framework for SQL Server. There was also an addition to our packages.config file, and a section added to the web.config.
Step 3: Set up Models and Entity Framework Context
Now that our framework has been installed, it’s time to create models for the database to generate tables from.
Go ahead and create three new files in the models folder, one for each of our model classes which will become tables: Client, Project, and Invoice:
public class Client
{
public int ID { get; set; }
public string FirstName { get; set; }
public string LastName { get; set; }
}
public class Project
{
public int ID { get; set; }
public string Title { get; set; }
public DateTime StartDate { get; set; }
public DateTime EndDate { get; set; }
public int ClientID { get; set; }
public virtual Client Client { get; set; }
}
public class Invoice
{
public int ID { get; set; }
public decimal AmountDue { get; set; }
public DateTime DueDate { get; set; }
public int ProjectID { get; set; }
public virtual Project Project { get; set; }
}
Entity Framework uses several conventions to make things easier for the developer. For example, when we created our model classes we gave each one a property called ‘ID’. Entity Framework will find and associate properties named ‘ID’ or ‘ID’ as our primary keys.
By default SQL Server will generate these keys, but we could supply our own keys by decorating the ID field with an attribute using [DatabaseGenerated(DatabaseGenerateOption.None)]. The virtual properties that we just added are called Navigation Properties and will allow us to easily ‘navigate’ between our properties that is, to get the projects for a given client, or an invoice for a given project.
The next thing to do is create a class derived from DbContext. Create a folder called DBContext and inside it, a file called ‘Context’. Add two using statements to the top section, one for System.Data.Entity, and one for our models namespace EntityFrameworkDemo.Models, and make the Context class inherit from System.Data.Entity.DbContext. This is all we need to do in our case, since we will use the default database (SQL Server Express) which Entity Framework connects to by default. It will create our database there as EntityFrameworkDemo.DBContext.Context; in other words, the fully qualified name of the Context class becomes the database name.
There are advanced steps you can take to connect to a different database using a connection strings and advanced configurations that’re possible when using the Context class. We’ll walk you through how to do this in the next article of this series.
For now let’s add a DbSet for each class, which represents the collection of entities in the database for each type. The complete Context class file should look like this:
using System.Data.Entity;

using EntityFrameworkDemo.Models;

namespace EntityFrameworkDemo.DbContext

{

public class Context : System.Data.Entity.DbContext

{

public DbSet Clients { get; set; }

public DbSet Projects { get; set; }

public DbSet Invoices { get; set; }

}

}
Now that we have our models set it’s time to create the database in. To do this we will use the Package Manager Console (you can find it under Tools -> NuGet Package Manager), which is a PowerShell console within Visual Studio designed to automate tasks and manage scripting language configurations with commands, and works seamlessly with NuGet.
The first command we will use is ‘enable-migrations’, which will do two things for us: create a folder called ‘migrations’ and add a class to that folder called Configuration.
A migration is a change to the database, in this case the migration isactually creating the database. Entity Framework uses a SQL engine which converts the migrations into SQL code, and then runs that code on the database. It also adds a table to the database, called __MigrationHistory, which contains a list of the migrations currently applied along with a hash of the current database state.
Opening the Configuration file shows a constructor which sets the Boolean property AutomaticMigrationsEnabled to false, and a method called Seed. Automatic migrations is a feature we won’t be using today, so we’ll leave it disabled. Seed is called every time the database is brought up to date with the last migration, and can be used to insert data that is needed along with the database updates. In this case we will use Seed to initialize our database with some sample data along with our initial migration.
Let’s add the following code to the Seed method:
var clients = new List

{

new Client {FirstName = "Dan", LastName = "Simmons"},

new Client {FirstName = "Bob", LastName = "Builder"},

new Client {FirstName = "Scott", LastName = "Markov"}

};
clients.ForEach(client => context.Clients.AddOrUpdate(c => c.FirstName, client));
context.SaveChanges();
var projects = new List
{
new Project
{
Client = context.Clients.Single(c => c.FirstName == “Dan”),
StartDate = new DateTime(2015, 10, 15),
EndDate = new DateTime(2016, 10, 15),
Title = “Entity Framework Project”
},
new Project
{
Client = context.Clients.Single(c => c.FirstName == “Bob”),
StartDate = new DateTime(2015, 10, 15),
EndDate = new DateTime(2016, 10, 15),
Title = “Bob’s Important Project”
},
new Project
{
Client = context.Clients.Single(c => c.FirstName == “Scott”),
StartDate = new DateTime(2015, 10, 15),
EndDate = new DateTime(2016, 10, 15),
Title = “Some Other Project”
}
};
projects.ForEach(project => context.Projects.AddOrUpdate(p => p.Title, project));
context.SaveChanges();
var invoices = new List
{
new Invoice
{
AmountDue = 34000m,
DueDate = new DateTime(2016, 12, 31),
ProjectID = projects.Single(p =>
p.Client == clients.Single(c => c.FirstName == “Dan”)).ID
},
new Invoice
{
AmountDue = 50000m,
DueDate = new DateTime(2016, 12, 31),
ProjectID = projects.Single(p =>
p.Client == clients.Single(c => c.FirstName == “Bob”)).ID
},
new Invoice
{
AmountDue = 2000m,
DueDate = new DateTime(2016, 12, 31),
ProjectID = projects.Single(p =>
p.Client == clients.Single(c => c.FirstName == “Scott”)).ID
}
};
invoices.ForEach(invoice => context.Invoices.AddOrUpdate(i => i.Project, invoice));
context.SaveChanges();
It’s important to call SaveChanges() after adding each Entity type if we want to properly link the objects since they won’t actually get an ID until they are saved to the database. Remember, by default, Entity Framework will have the database generate IDs for primary keys.
Step 4: Apply Migration
Now that our initial set-up is complete, let’s head back into the Package Manager Console and execute the command ‘add-migration Create’.

This will create a file called Create (prefixed with a timestamp) which contains the code to create our three tables. After reviewing the migration file to make sure everything will be created the way we want, we’ll execute ‘update-database’ to actually push the changes to the database. First though, we’ll run it with an additional switch: ‘update-database –script’, which won’t actually apply the changes to the database, but will write the SQL that’s generated into a new file. We can then review the pure SQL first and make doubly sure that it will do what we expect. If we need to make changes, we can alter the migration before applying the changes. This time, everything looks good, so we’ll go back to the package manager and execute ‘update-database’.

Now that the database is set up, we’ll need to create a controller and views for our new data.
Step 5: Add MVC Views
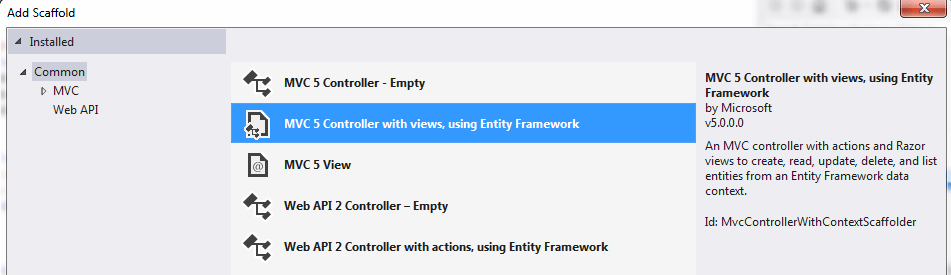
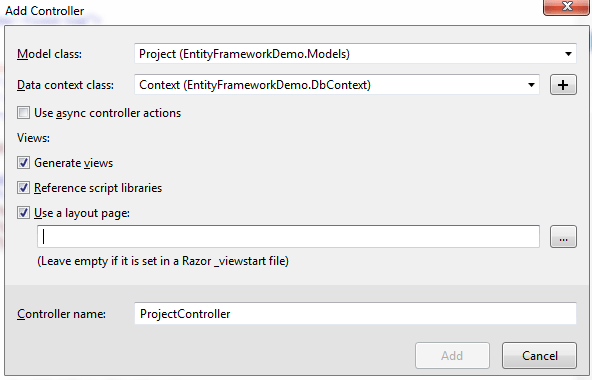
Right-click on the Controllers folder and select ‘Add -> New Scaffolded Item’, then select ‘MVC Controller with Views, using Entity Framework’. On the next form select ‘Project’ as our model, but leave the rest of the options set to their default setting.
Now looking at our Solution, we can see that the Scaffolder generated a new Controller file, ‘ProjectController’, and a new folder under Views with 5 new views for various aspects of viewing and editing Projects. Find your base layout page (_Layout.cshtml under Views) and add the following to the list of pages in the ul with CSS classes ‘nav navbar-nav’:
@Html.ActionLink("Projects", "Index", "Project")
This will add a link to the top nav bar for us to get to our new Projects page. Now we can run the application. Once you see your homepage, click on the ‘Projects’ link in the nav bar. You should see something similar to this:
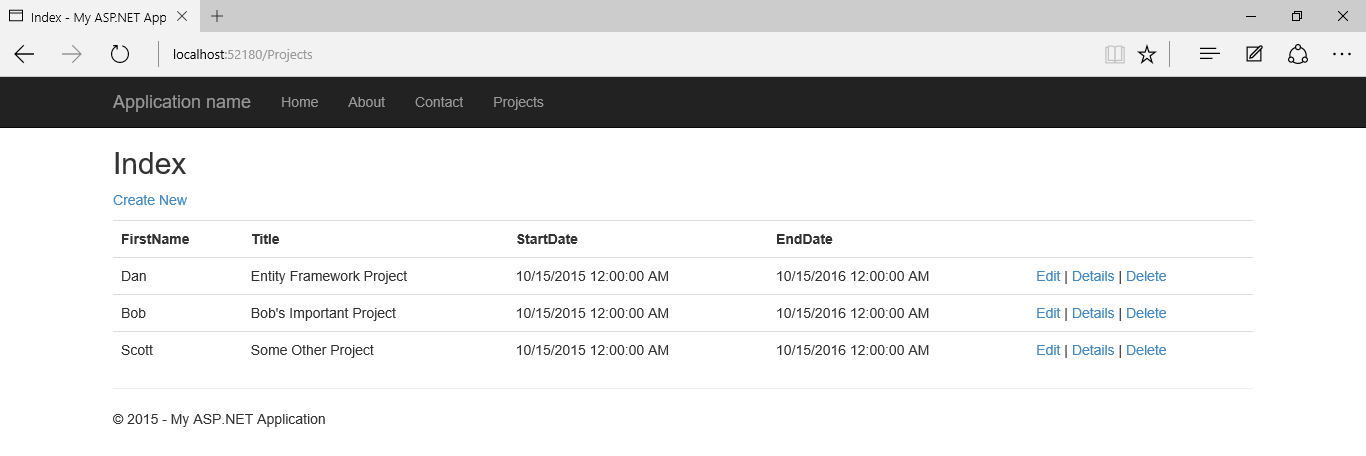
You can play around with the site to get a feel for how to interact with the data context, but notice how easy the setup was. Now we’ve got the ability to add, delete, and edit Projects, and the Scaffolder did it all for us! It even checks the model and does some validation when creating or editing, like forcing a project Start Date to be a date, etc. You can use the ‘DisplayName’ attribute on the models to have the column headers show a different title.
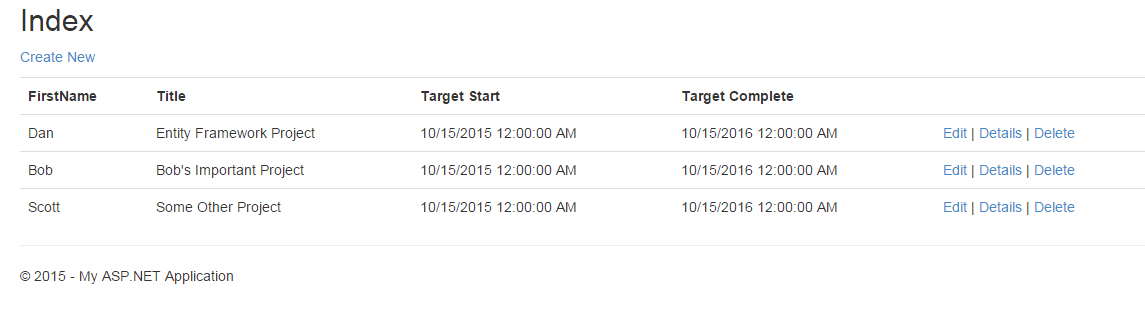
Let’s go change the ‘StartDate’ and ‘EndDate’ labels to something a little more friendly, go to your project class and add the attributes.
Now your class should look like this:
public class Project

{

public int ID { get; set; }

public string Title { get; set; }

[DisplayName("Target Start")]

public DateTime StartDate { get; set; }

[DisplayName("Target Complete")]

public DateTime EndDate { get; set; }

public int ClientID { get; set; }
public virtual Client Client { get; set; }
}
When you run it again and click on the ‘Projects’ link, you can see that the titles have changed:
Still have questions? Fill out the form below and a representative from our Application Development team will contact you to assist.